Learn how to use hiking poles – If you don’t know why adjusting the length on trekking poles is necessary when changing terrain, you won’t get any of the best hiking pole benefits.
A study found that antishock trekking poles can reduce the shocks imparted onto your knees by up to 25%.
When hiking 3-12 miles/day, this adds up fast!
But if you don’t know how to use hiking poles, you will only receive the disadvantages of trekking poles and no benefits.
What are the benefits
of hiking with poles?
The advantages of Nordic walking poles far outweigh any disadvantages. These benefits include:
 |
|
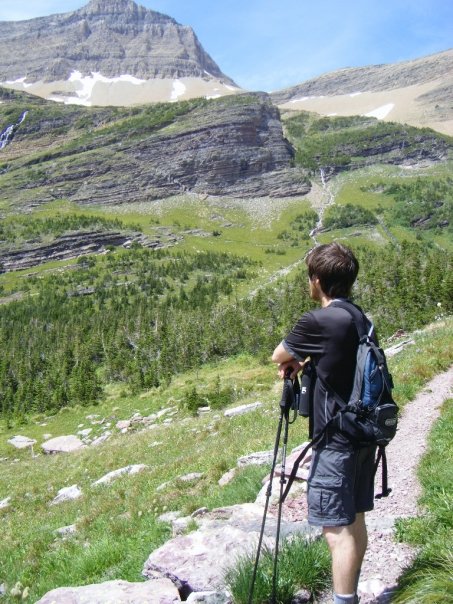
Resting on my poles and soaking up those breathtaking views |
- Reduce knee damage – Trekking poles absorb shock that otherwise would be taken in by your knees and hips
- Stability – Crossing snow banks or streams is dangerous, but with walking poles you have 4 legs, making these crossings easy!
- Rhythm – Keeping a steady pace allows you to hit your hiking goals
- Balance – The wrong step while hiking in Glacier National Park (or other National Parks) can be deadly
Still, if you don’t know how to use hiking poles, all of these benefits become disadvantages:
- Additional knee damage – Failure to adjust the length of trekking poles when hiking up or downhill can cause your knees to take additional shock and damage
- Less stability and balance – If your poles are too short when crossing streams or snowbanks, then you have a greater chance of losing your balance while crossing
- No rhythm – Placing your pole tips too far ahead or behind your step can create an awkward rhythm that makes hiking uncomfortable
How to Use Trekking Poles Correctly
Using hiking poles properly is simple.
Every pole has numbers on the shaft that tell the length. Use these numbers as reference for adjusting the height.
What is the perfect height of a trekking pole? Again, easy to find out. However, it depends on the terrain you are hiking (note: for each height adjustment, make sure you’re holding the grips and tips are against the ground):
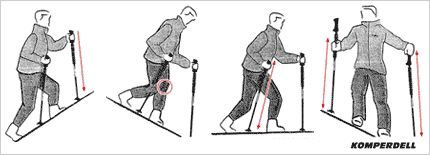
- On flat ground – Forearms should be parralel to the ground and elbows form a 90 degree angle
- When hiking uphill – Adjust the height about 1-2 inches shorter. If the terrain is incredibly steep, adjust more
 |
|
How to use hiking poles |
- When hiking downhill – Increase the length of your poles from their standard position. This will increase your balance and take pressure off your knees
- When crossing snow traverses – Your down-mountain pole should be longer than the up-slope pole (alternately, if your trekking poles are dualgrip, you can just grab the lower grip)
How to Use Hiking Pole Straps
It is essential to keep your hands through the wrist straps. This is because straps help take the pack weight off your hips and shoulders.
In order to grip your hiking pole properly, put your hand up through the bottom of the wrist strap instead of coming down from the top. Then tighten the wrist strap so it fits comfortably.
Locking Mechanism
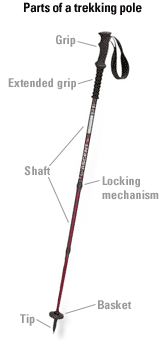
Every walking pole manufacturer creates different locking mechanisms for their poles. Some, such as Leki, are twist locks. These can be difficult and time consuming to adjust. Unless you only hike flat terrain, your hiking pole height will be adjusted numerous times throughout a hike. Difficult-to-adjust locking mechanisms can be a major disadvantage.
Below are the types of locking mechanisms used in Nordic walking poles and how to use them:
 |
|
Trekking pole parts |
- Super Lock by Leki – A twist lock system that is a pain to adjust, but the strongest, most durable, and dependable locking mechanism
- FlickLock by Black Diamond – Exactly as it sounds. This flick/lever lock clamps around the pole, is easy to adjust and secure
- DuoLock by REI and Komperdell – This locking mechanism is similar to Black Diamond except it applies pressure against the pole instead of clamping around it. Even easier to adjust and just as dependable
It’s important to note that even though Leki’s Super Lock is known as the most dependable, the clamp of my Komperdell Trekking Poles never came loose.
Return home from
How to Use Hiking Poles to the Glacier National Park Travel Guide


Speak Your Mind