Finding out that your sleeping pad has a hole in the backcountry stinks. I got sick because of it in Yellowstone. Wish I knew then what I know now on repairing a leak in your sleeping pad while camping.
Day trips can provide all the adventure and more that you could hope to have from nature. But sometimes, the only way to explore our great national parks, forests, and recreation areas is to plan an overnight or multi-day journey into the wilderness. This is a fantastic way to reconnect with nature and thrill at sleeping under the stars with the ground only inches beneath you. The whole experience can be ruined, however, by a faulty sleeping pad bringing your back too close to the ground for comfort.
The picture to the right shows my sleeping pad once it’s been fully repaired. But these repairs were done by Therm-a-Rest, once I returned home. What do you do if you find holes in your pad while you’re in the wilderness?
Three Steps to Fixing Your Sleeping Pad on the Fly
If your sleeping pad does spring a leak, you rarely find out about it under good circumstances. Of course, the best thing to do is to make sure all your equipment is in proper working order before heading out the door, but accidents happen no matter how prepared you are.
And sometimes, you’re just too busy to check your pad. When Allyson and I were in Yellowstone National Park a few years ago, my Therm-a-Rest sleeping pad was perfect for 5 days straight of camping in both the backcountry & frontcountry (Check out REI’s selection of Therm-a-Rest sleeping pads!)
However, something happened in between a night of frontcountry camping & a backpacking trip that punctured my sleeping pad. I had no idea about it until we were 10 miles into the backcountry and away from ‘civilization’.
Because of my sleeping pad not staying inflated, I slept essentially on the ground all night. Not having an inflated sleeping pad between you and the ground is a recipe for disaster. And I fell sick. Really sick. As in 103 degrees, barfing my brains out sick. And that sucked. Especially because we were only 1 week into a 2 week trip. We were supposed to go to the Grand Tetons after and instead all we did was drive by and wave. Bummer.
If only I had known then what I knew now. If you do find yourself in this predicament, here are three tips for identifying and patching the leak before you have to resort to positioning your sleeping bag on the comfiest looking rocks (and getting sick).

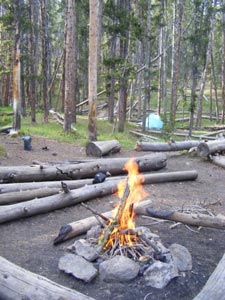
The Backcountry Campground I Got Sick At
Step 1: Make Sure the Leak Isn’t Coming from the Valve
A crack in the valve or the sealant immediately around it would be the easiest defect to spot. The pressure on and immediately surrounding the valve from the air flowing in and out of it makes it among the most likely areas to spring a leak, so you should definitely check here for problems before inspecting your pad inch by inch.
If you can’t find the source of the leak there, go to Step 2. If the leak is in the mattress immediately surrounding the valve, go to Step 3. If, however, process of elimination or a quick visual check finds that the source of the leak is in the valve itself, do not despair: Websites like backcountryedge.com and even general sellers like Amazon and eBay can provide you with valve repair kits. These will provide with a replacement valve and directions for removing your old valve and putting in the new one.
However, that does little to assist you in the backcountry. What I’d recommend doing is taking duct tape (hopefully you have some in your first aid kit), and wrapping it around the valve right before going to bed. This will help keep your pad inflated for much of the night.

Post-Backpacking: All Cleaned Up With Perry Sick & Allyson All Smiles
Step 2: Find the Leak if It’s Elsewhere
Time is of the essence if you need to find a leak that is elsewhere on the pad. If you have a bit of soap and can spare a bit of that and some water, the quickest way to discover the source of a leak is to gently douse the mattress in soapy water. Bubbles will form around the leak, and you can set to work repairing it.
If you don’t have soap or water to spare, put your flashlight on its highest setting and start looking around the pad’s seams. This is the next most likely area after the valve to develop holes. Run your fingers lightly over the area after your flashlight’s been there; you might be able to detect a gap that’s otherwise invisible to the eyes.
If the problem’s not in a seam, search the bottom of the sleeping pad first. If you still can’t find a leak here or in the top, you’re SOL. Sorry, Charlie.

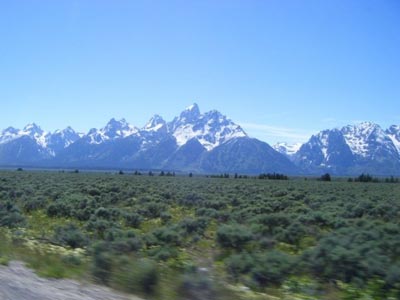
Driving Past the Grand Tetons (Picture Taken From Car)
Step 3: Repair the Leak Using Whatever Is on Hand
If the leak is somewhere in the pad itself, repairs can be a simple matter, if you have the right gear. You have 2 options: Duct Tape or Krazy Glue/GOOP Marine glue that will be readily available at most major stores.
If you have glue, try to apply it as thinly and evenly as possible–you don’t want to wind up supergluing your pad to your tent or sleeping bag. Make sure you cover the entirety of the tear’s edges, however. Even though the glue may only take 5 to 10 seconds to dry, give it one or two minutes just to be certain before attempting to inflate the pad again.
But we never have any glue in the backcountry. However, we always have duct tape wrapped around an empty film canister (which doubles as a pill bottle or spice container). This universal ALWAYS fixer should be in your backpack anyway due to its ability to patch holes in anything, and it will hold your sleeping pad together until you can do a full repair with epoxy back at home.
An ideal time in the backcountry is one in which the only challenges you face are to the heart rate and a mind expanding with the wonder of nature. But there’s no need for despair if you get an unwelcome surprise in the form of a sleeping-pad leak. Just a little extra preparation with repair kits and glue will ensure that roughing it doesn’t have to be too rough.
To Sum Up…
The most challenging part is identifying the leak before you go to bed. If you don’t even know about it or can’t find it, well, you’re in trouble and might get sick like me.
But if you are made aware of the leak before tucking in for the evening and can use the strategies listed above to identify it’s location, you should have no problem repairing it.
Remember, duct tape isn’t a permanent fix. Many companies, including Therm-a-Rest, will repair your sleeping pad for free. That’s what they did with mine. But you should have a back-up plan for when you’re camping in the wilderness (check out REI’s selection of Therm-a-Rest sleeping pads!).
Did This Article Help You?
Then please share your thoughts in the comments below, or give it a LIKE or a TWEET.
Finally, help us keep helping you. If you’re shopping for a sleeping pad (or any other outdoor gear), you can use one of the links on our site to go to REI, Backcountry etc. By using one of our links and then buying something, we get a small percentage of your purchase. It costs you nothing extra, but helps us out a great deal.
Here are the places we’d recommend buying a sleeping pad:


So, what was it that got you sick? Sleeping on the ground?
Yup!