Before We Get Started…
Do not go to the park without adequate protection from bears.
This means bear spray![]() . Take it with you on every hike. It is more effective than a gun would be in the event of a grizzly bear attack.
. Take it with you on every hike. It is more effective than a gun would be in the event of a grizzly bear attack.
Other items that I would suggest in addition to the bear spray![]() are:
are:
With these items, you should be set for a safe, awesome adventure in Glacier National Park.
<font=”+1″>Day 1
Welcome to Glacier!
Option 1
Lodging – Get a campground at Avalanche Creek or Apgar. Both are on the western end of Glacier National Park and offer top-quality campgrounds.
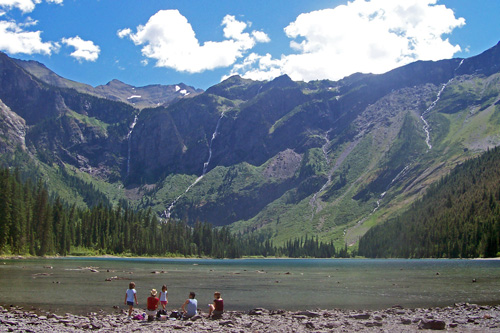
Activities – Hike Avalanche Lake trail. Avalanche Lake is a half-day hike from Avalanche Creek Trailhead to Avalanche Lake. Round trip it is 6 miles and gains 505 feet. Very easy, but very rewarding. Pack a lunch and make a picnic out of it.
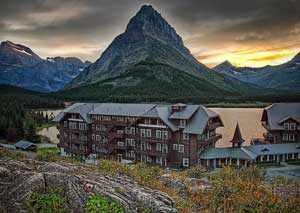
In the evening, watch the sunset over Lake McDonald from the back of the lodge. Sunsets can be breathtaking from Lake McDonald and it is a perfect way to end your first day in the park.
For dinner, head over to Jammer Joe’s across the street from Lake McDonald Lodge.
If you are in the mood for dessert, try some ice cream at Apgar Village.
 |
|
Avalanche Lake |
Option 2
Lodging – Spend the evening at Village Inn at Apgar. Offers stunning views of Lake McDonald
Activities – Avalanche Lake. You must hike this trail while visiting. It is perfectly suited to meet your trip needs and physical demands.
<font=”+1″>Day 2
Rise and shine! Hopefully you are well rested and ready to explore more of Glacier National Park. Today you will drive Going to the Sun Road and see what this park is really made of!
Option 1
Lodging – I’d recommend staying another night at the campground you chose last night. No reason to spend extra energy packing up and moving. Your time could be better spent exploring.
Activities – Wake up early. Eat breakfast at Apgar Village Lodge or Lake McDonald Lodge. Alternately, cook up a breakfast at your campground.
Then, hop in your car and drive into the heart of the park, up Going to the Sun Road!
This is an all morning activity. Enjoy the pulloffs, take plenty of pictures along the way. It is beautiful.
You will arrive at the Visitors Center at Logan Pass before long.
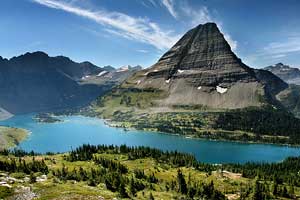
From there, Hike Hidden Lake Trail. Be sure to go to the Lake, not just the overlook. It is 6 miles roundtrip and similar difficulty to Avalanche Lake.
There might be lingering snow so bring waterproof gear.
It can get crowded, so be sure to arrive early. Pack a lunch and make a picnic out of it.
Spend the afternoon exploring Going to the Sun. Wildflowers will light up the meadows and you are bound to see mountain goats and big horn sheep. If you hang out until dusk, you will likely see a black bear or grizzly on the road around Siyeh Bend Trailhead.
Perfect opportunity for photographs with your long lens 🙂
For dinner, return to your hotel and eat dinner inside Lake McDonald’s lodging area. It can be a little pricey though, so you can always head to Apgar instead for dinner, which is more reasonable.
 |
|
Hidden Lake |
Option 2
Lodging – Again, stay where you are. No reason to expend all the extra energy moving around if you do not have to.
Activities – Let’s go fishing!
Hike to Snyder Lakes, which is 8.8 miles round trip.
Begins at Snyder Creek Trailhead, which is directly across from Lake McDonald Lodge. Cutthroat trout are plentiful, so this is ideal for catching, photographing, and releasing.
It’s a moderate hike that shouldn’t be too troublesome.
<font=”+1″>Day 3
We’re going to take you to a hidden section that few people go to–Polebridge. It will allow you to avoid most of the tourist crowds and let you escape into my favorite part of Glacier.
Wake up early. Eat breakfast and hit the road. You will be driving in the OPPOSITE direction from Logan Pass.
Drive past the West Glacier exit and continue on toward Polebridge.
Learn more about Polebridge from my Page on Polebridge
Option 1
Lodging – Get a cabin at Polebridge. It’s bare bones, but quite the experience.
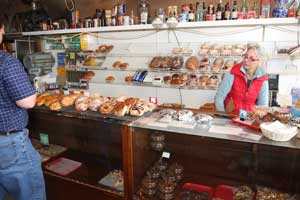
Activities – Driving to Polebridge will take up much of your day. Stop off at the Polebridge Merc and enjoy some cinnamon rolls and stock up on supplies. Enjoy the evening around a campfire.
 |
|
Polebridge Bakery/td> |
Option 2
Lodging – Get a cabin at the Polebridge Merc, or rent a Teepee. Like I said, it’s really a sweet experience.
Activities – Explore the area
<font=”+1″>Day 4
Option 1
Lodging Stay a second night where you currently are.
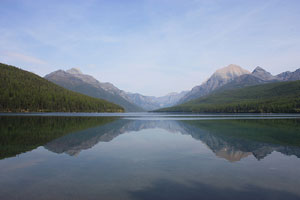
Activities: Hike along the edge of Bowman Lake. It’s a moderate hike without much elevation gain and takes you to a remote, beautiful area where you can hear wolves howl.
Another great opportunity for fishing.
 |
|
Bowman Lake |
Option 2
Lodging – Stay where you are.
Activities – Pack a lunch. This is going to be a long day.
If you are feeling adventurous, hike Numa Ridge Lookout. It’s 12 miles roundtrip and gains 3,000 feet. The most beautiful lookout in all of Glacier.
Otherwise, hike Akokala Lake. About 6 miles but only gains 1,000 feet. Both begin at Bowman Lake and are incredible hikes.
<font=”+1″>Day 5
Pack up, move out, we’re going to Many Glacier.
Option 1
Lodging Book a room in advance at Many Glacier Hotel. Or, get a campground at either Rising Sun or St. Mary (east side of Glacier National Park). You can try getting a campground at Many Glacier, but it fills up SUPER early and the likelihood of getting a spot is slim.
Activities You have a long, fun day ahead of you. Get going early to ensure that you get a campground.
Drive from Apgar/Lake McDonald Lodge, over Logan Pass and to Many Glacier Hotel.
Unpack and then for the afternoon you will be hiking one of my favorite hikes, Iceberg Lake.
Iceberg Lake begins at the Swiftcurrent Inn and is a moderate hike that is 10 miles roundtrip and gains 2,000 feet.
Bears are abundant in this area of the park, so be certain you order Bear Spray![]() ahead of time. Bring it on ALL your hikes, especially Iceberg Lake.
ahead of time. Bring it on ALL your hikes, especially Iceberg Lake.
It’s better to order Bear Spray![]() online than buying it in the park. You will save about 40 dollars.
online than buying it in the park. You will save about 40 dollars.
 |
|
Sunset behind Many Glacier Lodge |
Option 2
Lodging – Get a room at Many Glacier Lodge and relax. Or, a campsite at the above mentioned campgrounds.
Activities – If you are tired from all the driving, you can do a nice, easy hike and see two gorgeous waterfalls.
The hike is St. Mary and Virginia Falls. They begin on Going-to-the-Sun road and it’s 4 miles round trip with only gaining 250 feet.
Day 6
Today you will be hiking my favorite day hike in Glacier National Park – Siyeh Pass.
Option 1
Lodging -Stay at Many Glacier.
Activities – Pack a lunch, bring water. Today will be long, but fun.
Drive Going-to-the-Sun toward Logan Pass. Park your car at Siyeh Bend. You will be hiking 10.3 miles, gaining 2,240 feet and losing 3,440 feet.
By now you should be acclimated to the altitude, so it shouldn’t be too terrible. This hike is gorgeous. Do not pass it up.
The trail drops you off about a mile down Going to the Sun from your car. Just stick your thumb out and hitchhike back. Hitching is safe and easy in Glacier.
For dinner, drive into St. Mary and eat at the Park Cafe. Best restaurant around Glacier. Don’t miss out on a slice of their homemade pie! Yummmmmy!!
Option 2
Lodging Stay at Many Glacier Lodge.
Activities Any of the last three hikes I have recommended should be done. Iceberg, Siyeh or St. Mary Waterfall.
If you are feeling a little lazy, you can always drive around and explore Two Medicine area. For the evening, watch the sunset at Many Glacier Lodge.
Day 7
Option 1
Lodging – Again, stay at Many Glacier or your current campground.
Activities – Wake up early today and get to Goose Island on Going to the Sun. Sunrise is beautiful here and this is prime location for photography lovers.
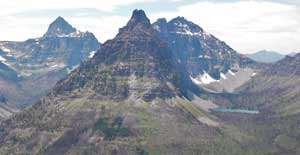
In the afternoon, head to Two Medicine and hike to Scenic Point.
The trailhead’s at Two Medicine Road and the hike’s 3.1 miles with a 2,200 foot elevation gain.
 |
|
Two Medicine Pass |
Option 2
Lodging Stay at your current location.
Activities Hike to Gunsight Lake and Florence Falls.
Pack a lunch, your fishing poles and bring the camera.
Trailhead starts at Jackson Glacier Overlook and goes approximately 6 miles to Gunsight Lake (plus another 6 back). Don’t forget about the Florence Falls overlook, which adds another 2 miles onto the trip but is well worth it.
Elevation gain is 3,200 feet.
Recommended Equipment
Here are my recommendations for hiking and camping equipment that suits your itinerary
Down Sleeping Bag: Go Lite Adrenaline![]()
Bear Spray: Bear Spray![]() is a must for any Glacier trip. Order it ahead of time and save about 40 dollars.
is a must for any Glacier trip. Order it ahead of time and save about 40 dollars.
Backpack: My girlfriend has this Osprey pack and I almost bought it, too (opted for their new, ultra light pack). Osprey Atmos 65![]() .
.
Tent: The MSR Hubba Bubba![]() . Another, cheaper option is the Eureka 2 Person Spitfire
. Another, cheaper option is the Eureka 2 Person Spitfire![]() . I use this tent and love it (plus, it’s WAY cheaper than MSR’s).
. I use this tent and love it (plus, it’s WAY cheaper than MSR’s).
To Conclude…
The itinerary can be followed precisely or you can chop it up and play with it how you want.
If you are feeling more lively and adventurous one day, hike the more strenuous trails. If the opposite is true, relax with easy hikes.
Hope this itinerary helps you have an amazing trip!
If you have any questions, suggestions, comments etc., feel free to contact me. I’d love to hear how your trip went!
Best regards,
Perry


